flowchart TD
    user("user")

    python["Python"]
    r["R"]
    arcgis["ArcGIS"]
    qgis["QGIS"]

    proxy(["proxy"])

    source[("source")]
    rescue1[("rescued data")]
    rescue2[("rescued data")]

    wayback[("WayBack Machine")]
    repo[("other repositories?")]

    user --> python
    user --> r
    user --> arcgis
    user --> qgis

    python --> proxy
    r --> proxy
    arcgis --> proxy
    qgis --> proxy

    proxy -->|ensures backup| wayback
    proxy -->|ensures backup| repo

    proxy --> source
    source -->|falls back to| rescue1
    rescue1 -->|falls back to| rescue2

    classDef sourceTool fill:#cfe2f3,stroke:#000,color:#000
    classDef process fill:#ffff00,stroke:#000,color:#000
    classDef datastore fill:#cfe2f3,stroke:#000,color:#000

    class python,r,arcgis,qgis sourceTool
    class proxy process
    class source,rescue1,rescue2 datastore

    click repo href "https://github.com/investinopen/ptps-wildfire-demo/issues/11" _blank
Fallbacks
When source data (from a government, etc.) gets taken down, this can stop its users dead in their tracks. Sometimes the data has been rescued by a third party, but it’s not always easy to find, use, or comprehend. This project aims to make that simpler, providing a “fallback” behavior when original data sources aren’t available. Essentially, we want to save data users from digging through the Data Rescue Project (DRP) Portal, if they even know to look for it.
Use cases
User groups
For this phase of the project, we are targeting the following user groups:
- Researchers
- Operational people
- Emergency managers
- Fire departments
Tools
We aim to support the following tools:
- Python
- R
- ArcGIS
- QGIS
- Nice-to-haves:
- DuckDB
- PostgreSQL/PostGIS
Also paper! See the firefighter maps.
HTTP proxy
The fallback behavior is available through a proxy, retrieving source data that’s available or letting you know where to find data that’s missing. The proxy will also passively archive URLs in the Internet Archive if they don’t already exist there, preventing any future situation where a dataset disappears.
A proxy routes web requests through another service (here, 127.0.0.1:8080). A certificate lets tools trust secure (https://) traffic from that proxy.
Architecture
Usage
Install dependencies:
- Python
- uv
Clone the repository and install Python dependencies:
uv syncOptional: Set up credentials for the Internet Archive. This avoids rate limits.
Create environment variables file.
cp .env.sample .envFill out that file.
-
uv run mitmdump -s ptps_wildfire_demo/proxy/fallback.py In another terminal, install the certificate.
curl --proxy 127.0.0.1:8080 --cacert ~/.mitmproxy/mitmproxy-ca-cert.pem https://example.com/Connect from a supported tool.
- Python: see demo notebook.
- QGIS:
- Open Preferences → Network → Proxy.
- Enable Use proxy for web access, then set type
HTTP, host127.0.0.1, and port8080. - For
https://dataset URLs, install/trust the mitmproxy CA certificate from the previous step:- Temporarily enable manual browser proxy
127.0.0.1:8080. - Open http://mitm.it/ and follow the install steps for your OS.
- Disable the browser proxy again.
- Temporarily enable manual browser proxy
- Click OK, restart QGIS, and load a web dataset URL (WMS/WFS/WCS).
- Instructions for the others to come.
Python package
Install the package directly from GitHub using uv (preferred):
uv add git+https://github.com/investinopen/ptps-wildfire-demo.gitOr with pip:
pip install git+https://github.com/investinopen/ptps-wildfire-demo.gitUse Resolver to look up available rescue sources for a URL:
import httpx

from ptps_wildfire_demo import Resolver

async with httpx.AsyncClient() as client:
    rescue = await Resolver(client).get_rescue("https://example.com/data.csv")
Browser extension
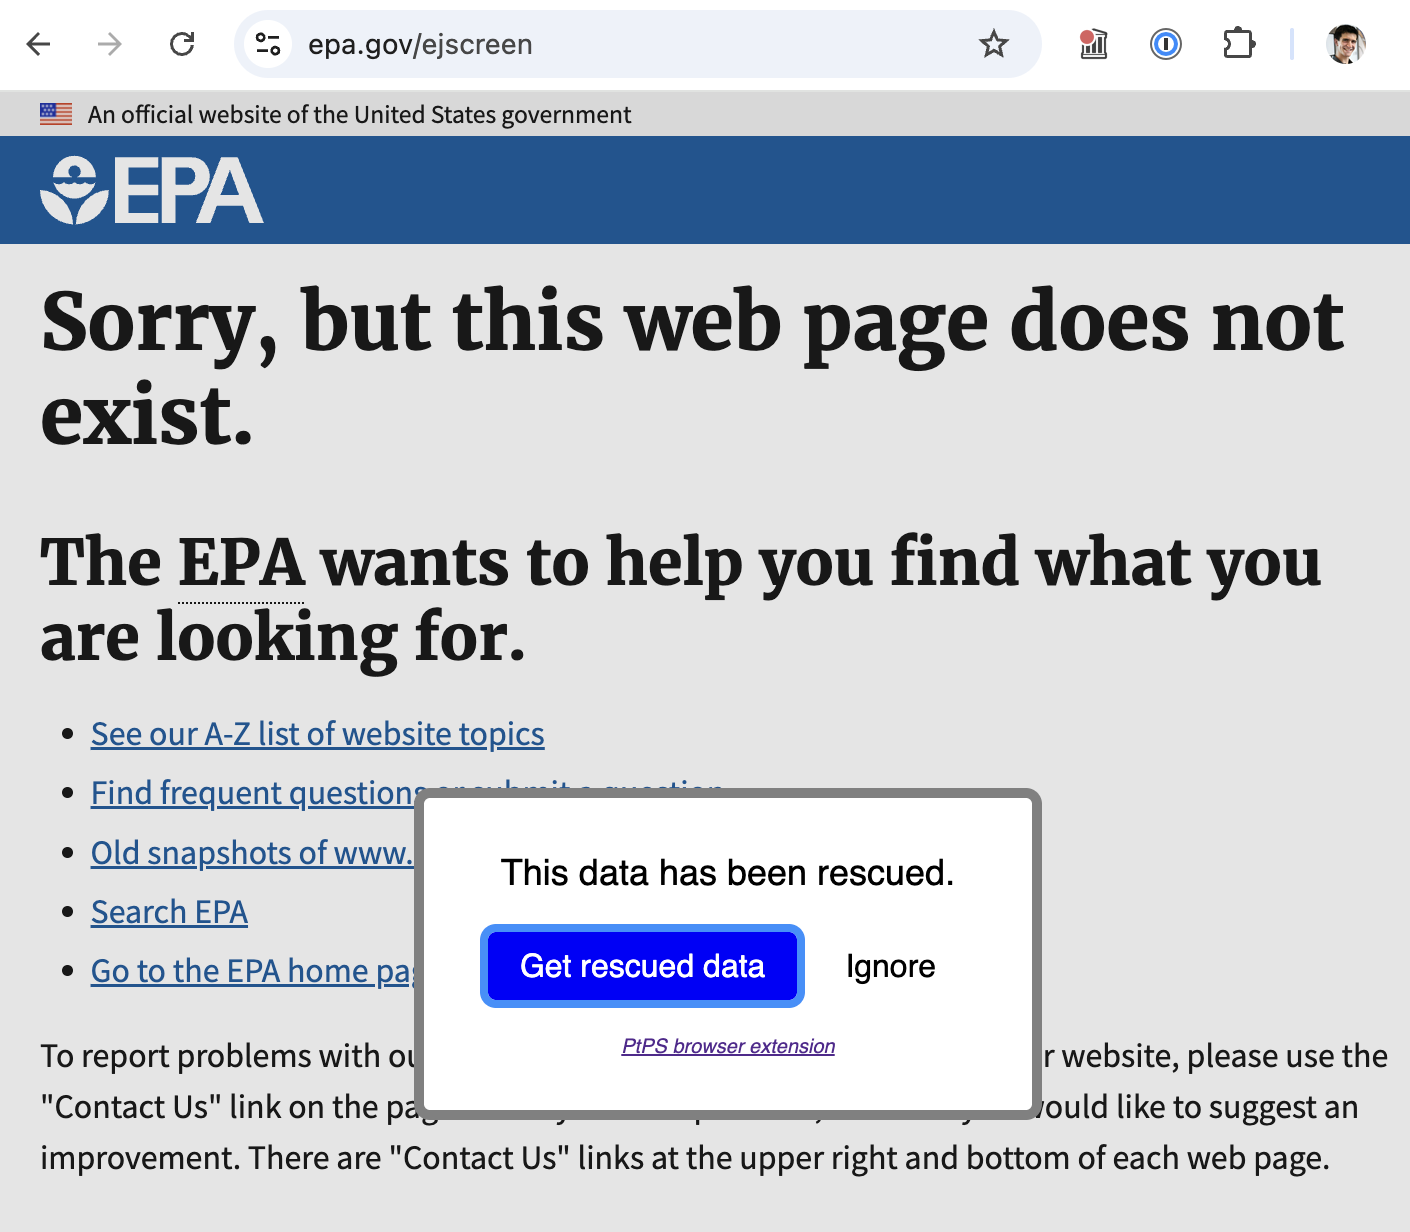
Usage
It’s recommended that you use this alongside the official Internet Archive Wayback Machine extension.
Install Node.js.
Clone the repository and install npm dependencies:
cd extension
npm install
Build the extension:
npm run buildLoad the unpacked extension from
extension/dist/into your browser:- Chrome/Edge:
chrome://extensions→ enable “Developer mode” → “Load unpacked” → selectextension/dist/ - Firefox:
about:debugging#/runtime/this-firefox→ “Load Temporary Add-on” → selectextension/dist/manifest.json
- Chrome/Edge:
Development
npm run watch— rebuild on file changesnpm run typecheck— type-check without emittingnpm test— run the test suite (hits live network endpoints, mirroring the proxy’s Python tests)